
The best way to replace a rotting railroad tie retaining wall is to pull out every tie and buried anchor, rebuild on a compacted stone base with drainage behind it, and use segmental block, natural stone or boulders that will outlast wood by decades. Replacing a few soft ties at a time only moves the rot further down the wall.
A lot of St. Louis yards still have railroad tie walls. They were cheap, easy to stack and everywhere in the ’70s, ’80s and ’90s, and most of them are now at the end of their life. If your ties are soft, splitting or leaning, the real question isn’t whether to replace the wall. It’s what to replace it with and how to do it without tearing up the rest of the yard.
This post covers both. If you’re still deciding whether your wall is failing, start with Is Your Retaining Wall Failing? and come back. If you already know it’s time, read on, or go straight to our retaining wall replacement page.
Why Railroad Tie Walls Don’t Last
Wood that sits in wet soil eventually rots. Treated timber slows that down, but it doesn’t stop it. Treated timber walls commonly last somewhere around 15 to 25 years, and many of the ties used in residential walls were already used and weathered when they went in.
The parts that fail first are the ones you can’t see. That’s the bottom course sitting in soil and the “deadmen,” which are ties running back into the hill to anchor the wall. Once those rot, the face of the wall starts leaning even if the top still looks fine.
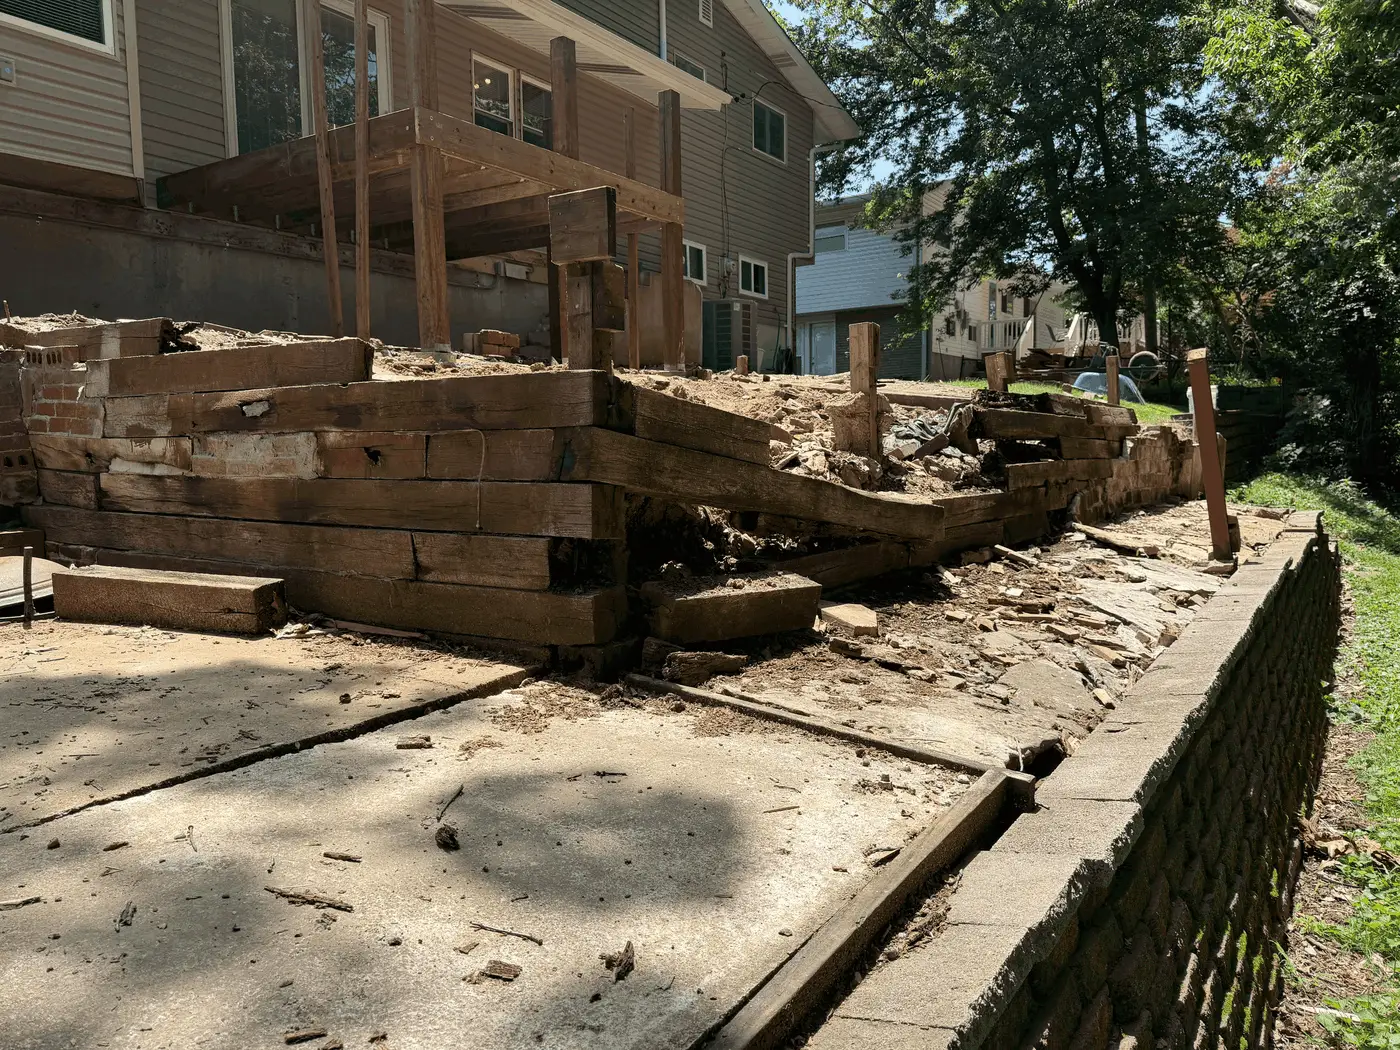
By the time a wall is past saving, you’ll usually see soft wood you can push a screwdriver into, spikes or rebar sticking out, gaps with soil spilling through, and a lean that gets worse every spring. Swapping a few ties at that point only moves the problem down the wall.
That said, not every tie wall needs a full rebuild. A short, low row of ties used as edging around a bed isn’t holding back much soil, so if one tie rots, swapping it or pulling the edging out and regrading is often enough. The rebuild we describe below is for walls that hold back a real slope, where a failure means the yard above moves with it.
What to Replace Railroad Ties With
You have three solid options, and all of them outlast wood by a wide margin when they’re built on a proper base with drainage behind them.
| Option | Look | Lifespan | Relative cost | Best for |
|---|---|---|---|---|
| Segmental concrete block | Clean, uniform, many colors | Decades | Mid | Most yards, and walls with steps, curves or height |
| Natural stone | Organic, blends with plantings | Decades | High | Garden walls, front yards, wooded lots |
| Boulder wall | Rugged, natural | Decades | Mid to high | Big slopes with room for a wider footprint |
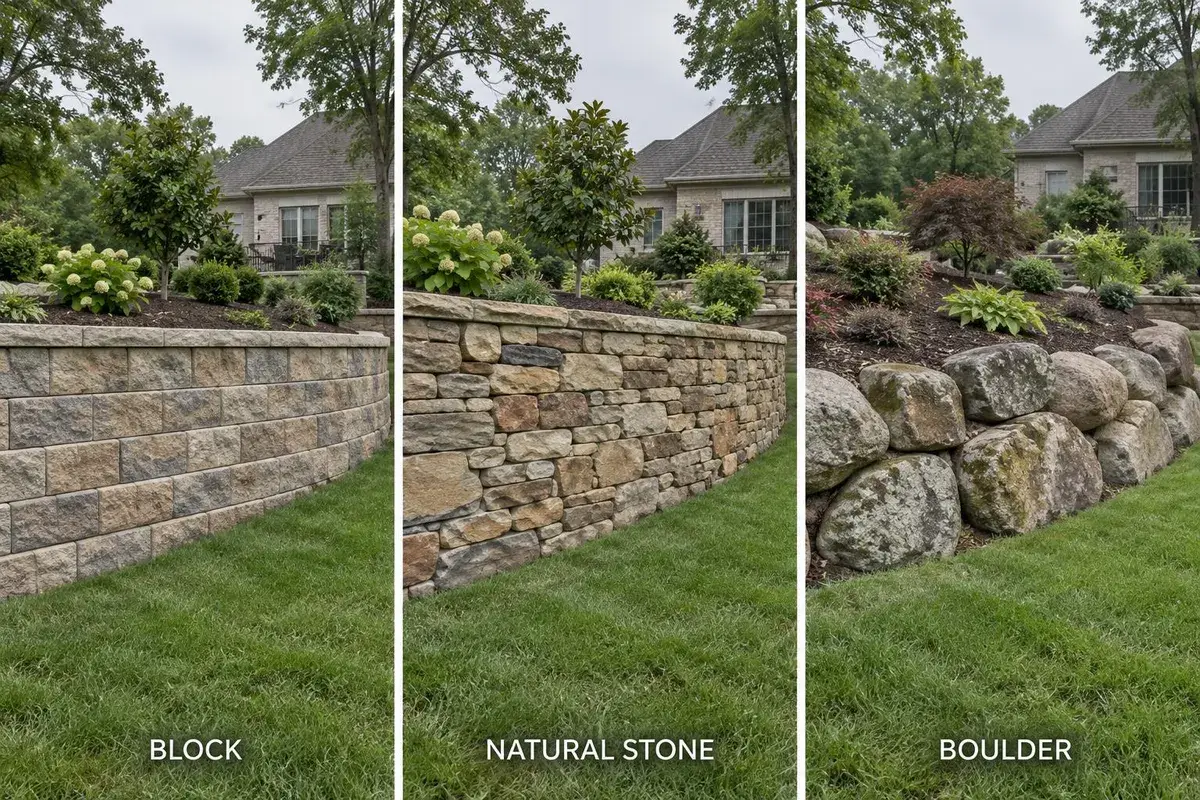
Alt: Railroad tie wall replacement options: block, natural stone, boulder
Segmental block is what we build most. The blocks are made to lock together, they handle height with geogrid, and if one ever gets damaged it can be swapped out. Because we’re a Keystone Authorized Contractor, your wall is built with the right product and install knowledge for the base, the drainage and the reinforcement.
Natural stone gives a softer look. We dry-stack it with mortar behind, so you don’t see mortar joints from the yard. Our natural stone walls in University City are a good example of how it sits with plantings.
Boulders work on larger slopes where you have the room. They need more space front to back than block does, so they’re a better fit for big yards than tight ones.
How the Tear-Out and Rebuild Works
Replacing a railroad tie wall isn’t the same as building a new wall on open ground. The old wall has to come out cleanly first, and there’s usually more buried in the hill than you’d expect. Here’s the order we work in:
- First we pull every tie, deadman, spike and piece of rebar. Wood left buried behind the new wall keeps rotting and settling, and it takes the wall with it.
- Then everything gets hauled off. Old ties are often creosote-treated, so they go off-site for disposal and should never be burned.
- Next we re-excavate, digging out loose fill and rotted material so the new wall sits on solid ground.
- After that we set the base, using compacted crushed stone leveled for the first course. On the tie replacements we scope, that base is 8 inches.
- Then the drainage goes in. Drainage stone and perforated pipe go behind the wall. Most railroad tie walls had none, which is a big part of why they pushed out.
- Once the drainage is in, we build the new wall course by course, add geogrid where the height calls for it, compact the backfill and set the caps.
- Finally we regrade above and below the wall and restore the beds or lawn.
See Related Work

Are Old Railroad Ties Toxic, and What Happens to Them?
Old railroad ties were treated to keep them from rotting, and that treatment is the reason they need careful handling when they come out. Missouri’s Department of Natural Resources says railroad ties and utility poles are routinely treated with creosote and pentachlorophenol, and the state treats waste ties as regulated solid waste (Missouri DNR fact sheet PUB0196).
In practice, that means two things for a homeowner. First, the ties can go to a permitted sanitary or demolition landfill in Missouri, and open burning them is prohibited. The EPA says the same thing more bluntly: “Do not burn creosote or other preservative-treated wood in a residential setting” (EPA, Creosote). Second, think twice before reusing the old ties somewhere else in the yard, like a raised vegetable bed, and check your city’s rules if you plan to.
When we replace a tie wall, the ties come out with the rest of the debris and leave the property with our crew, so you aren’t left with a pile of creosote-treated wood by the curb.
Fix the Safety Problem Now and Redesign Later
Sometimes the wall is the urgent part and the rest of the yard can wait. That’s common with businesses and nonprofits, where people walk past the wall every day and a rotting tie is a real trip and fall risk.
In that case we usually split the work into two phases. The first phase replaces the failing wall and fixes any uneven walkways or patio areas right next to it, because those are the hazards. The second phase is the bigger landscape design, with plantings, lighting and any new features, done when the budget and timing allow.
We design the first phase so it fits the second. That means the new wall goes where the finished layout needs it, not just where the old ties happened to be. If the walkway next to your wall is sinking too, see Why Are My Pavers Sinking?